Well, if you read the entries from 2013/2014, you know that I contracted a nasty form of cancer that I thought was going to keep me away from the boat for one season. As it turned out, that became five seasons - and counting. I spent most of that five years fighting various forms of cancer and it is only now that I feel up to working on the boat.
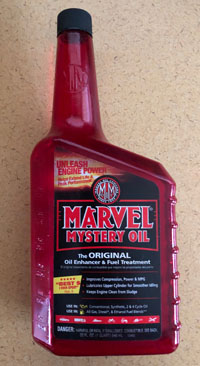
I did manage to get the boat steamed up on the trailer and into the Independence Day Parade in Manzanita each year; it just did not get into the water. And because it did not run for five years, when I tried to turn the engine over this year, it wouldn't budge. It was completely frozen. I tried using the biggest pipe wrench I own on the propeller shaft with no luck. It was when my cousin came to visit and saw my dilemma that he recommended I use a product called Marvel Miracle Oil to try to free it up. Nothing else was working so I decided to take him up on the recommendation. I removed the cylinder heads and valve covers and applied copious amounts of the oil to the cylinders and the valve gear. Dennis had told me that it would take a while, so I went out each day and worked the pipe wrench - trying to get something to move. On the seventh day, I almost fell on my butt when the usual pull on the wrench handle suddenly worked and the prop shaft began to rotate! That stuff works pretty good.
I am going to back up in this narrative a bit to explain what got me working on the boat after all that time. When I had the boat steamed up for the parade on July 4, 2018, everything was working great. At least, it was working great that morning when I steamed it up in the driveway. When I towed it over to Manzanita and got in line for the parade, the burner began to malfunction. When I tried to top off the steam pressure, the burner responded by lighting off and making fire - it was just fire on the wrong side of the boiler! I had flames all over the outside of the boiler area and I used up the contents of the fire extinguisher getting the fire under control. This all happened in the "form-up" area for the parade. There were about 40 other exhibits in that parking lot, hundreds of people manning those exhibits and thousands of eager parade-watchers lining the streets in the area. Not to mention that I had my family on the boat! I decided that we were done trying to make steam that day and that we would just limp along in the parade with what we had. We did toot the whistle - just not as often as we normally would in the course of the parade route. But I digress. When I got the boat home after the parade, I discovered that the source of the fire was a cracked copper tube in the propane line. After inspecting other lines in that part of the system, I decided that the entire antiquated burner system needed to be either replaced or at the very least, cleaned and inspected. Once I began that process, the rest - as they say - is history.
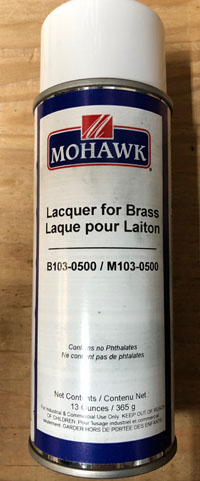
So, while I was waiting for the Marvel Mystery Oil to do its thing, I started on the copper tubing. I began by stripping all of the tubing in the burner system and replacing it with new. Now, the new stuff looks pretty good, but it still has a film or oxidation on it. Ordinarily that is not a problem - the way it looks has no effect on the way it works. But, I figured I could make it all look better by putting each line, valve, and all the fittings on the buffing wheel. I picked up an inexpensive double buffer at Harbor Freight and stocked up on Tripoli and Jeweler's Rouge at Amazon and began the polishing process. By the time I finished, I had some spiffy-looking stuff on the boat. Well, of course all of the other copper and brass on the boat was looking pretty shabby by comparison, so I began taking everything made of copper, brass or bronze off the boat and polishing it. I picked up some brass lacquer and coated everything to keep it all shiny. By that time I had a lot of "bling" on board, but still did not have an operating steam system.
I also re-worked the shifting mechanism while I was waiting for the penetrating oil to perform its magic. The shifter on the Semple compound engine is a slip-eccentric and has never worked well for me. There were a couple of things contributing to that: (1) the shift lever is mounted above the engine and the connecting linkage was never designed well. And (2), the shift lever always operated backward to my way of thinking - push it forward to back up and pull back to go forward. I pulled everything off the engine and re-did the linkage. I flipped the shift lever to the other side of its mounting post to allow it to move the eccentric to the forward position when the lever is pushed forward. I fashioned a new connecting link out of half inch pipe and hooked it all up. Of course, the brass shift lever received a vigorous polishing and the entire slip-eccentric was bathed in Mystery Oil. The preliminary results have been satisfying. The shifting is now effortless and (at least in my mind) operates in the proper direction. Still, though, the engine had not turned over.
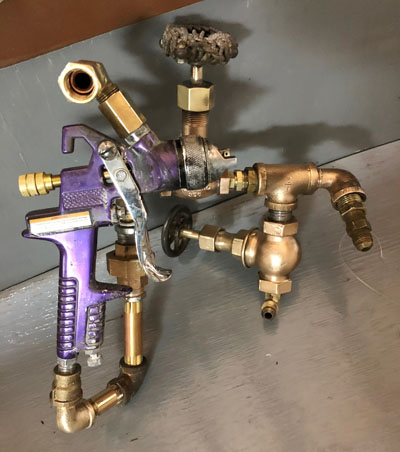
One of the things I had been waiting for (actually, three things) was the arrival of three strainers that I had ordered. Once those arrived, I installed them and the system was more or less complete and ready for testing. I picked a relatively sunny day and moved the boat outside. Ray came over to help and we started to steam it up. Now, understand that there are several potential issues that could develop as we fired it up. First, the engine has not run in five years. Second, many of the fittings in the steam system have been removed and replaced. Third, it wasn't working all that well when the cancer put me on the shelf five years ago. The first thing to develop was the burner system wasn't working well. If you have read the information on the boat elsewhere on this site, you know that I use a modified paint gun as a burner. Instead of paint and air, I mix oil and steam. When it works, it works great. Anyway, I had to replace the old original Binks gun and replace it with a different model. We'll call that one "Paint Gun Number Two". That in itself took a lot of doing because - as I discovered - no two paint guns are built (plumbed) alike. And, since I have to atomize with propane until we get 15 pounds of steam, any leak becomes an immediately apparent! Firing it up, we discovered that the burner was going to take some tinkering. So, off it came and - tinkering complete - reinstalled. More flames in the wrong places, so - repeat the above process. After the third tweak I decided that the flames escaping from the spray gun were now small enough to be manageable and we continued the steam-up process. Or at least, I did. Ray was ready to jump overboard - too much fire in the wrong places for him! I was pretty sure the flames would decrease as the burner got hotter and they did - although that process took much longer that either of us was comfortable with!
So, after firing up and waiting for the system to come up to pressure, we managed to get to 100 pounds in spite of a dozen small steam leaks. A quick toot on the whistles because - well, I can't just steam it up and not blow a whistle! Now it was time to get the engine to turn over. I opened the throttle valve and - nothing. I opened it all the way - still nothing. After checking to see that all of the valves in that system were open, I opened a bleeder valve on the high pressure cylinder and - nothing! There's steam getting to the equipment just upsteam from the HP cylinder, but nothing getting to the engine itself. So, that's where I am today. I had removed the heads and valve covers in the process of trying to free the engine and had formed new gaskets. That's where I'm going to begin - those gaskets could be fitted incorrectly and must be blocking the steam. We'll see.
December 11, 2018
This may be one of those times where I regret putting the record of this entire process online. More on that thought in a moment. First, I pulled the heads and the valve covers and found what I thought I'd find - the gaskets aren't covering anything they aren't supposed to be covering. They are in perfect position and are doing just what they are supposed to be doing. So, why wouldn't the engine get any steam? I rigged up the air compressor to feed air through the steam chambers and found them clear and functioning. Knowing that I did not have a problem with the heads and valve covers, I re-installed them and tried to run the engine on air. All I could get was about 20 pounds in the boiler. I thought I could hear air escaping but that compressor is one of the loudest things on the face of the earth and there is no way I could identify any strange sounds as long as it was running. So I shut it off and while I still had part of my 20 pounds remaining, felt along the steam line to see if I could feel any air escaping where it shouldn't be. In the course of doing that, I opened the main steam valve to check it out. Wait! OPENED the main steam valve? In that brief and highly embarrassing moment, it all became abundantly clear - I had been opening the throttle valve with the main steam valve CLOSED!! Of course the engine wouldn't turn over - there was no steam because the steam valve was closed! Sheesh... Well, I DID say that it had been a long time since I had run the engine!
January 15, 2019
In spite of my temporary setback with the steam valve issue, I had the best of intentions of trying to get the boat steamed up and the engine rolled over. But in that month any number of distractions took precedence and the boat sat comfortably in her new heated quarters. Numerous trips to the valley, holiday plans, honey-do lists and mostly just rotten December weather on the Oregon coast precluded the chance to get her outside where she could be steamed up. Today was finally the day and as soon as the air temperature crawled above 40 degrees F. I fired her up.
I have noted elsewhere on these pages how this burner/steam cycle works, but here it is again. We use oil for fuel. And then atomize the oil feed with steam to make a nice hot fire. Until I get steam for atomization, I use propane. Easy to use and it gives me a nice hot fire immediately. The burner system is plumbed so that when boiler pressure exceeds the pressure in the propane tank, it closed a check valve in the propane line and allows the steam to take care of the atomization. Simple and very effective. I bring that up again because in today's steam-up, pressure built steadily until it reached the magic cut-off and suddenly I had no atomization! I'm not getting steam to the burner. I started back tracking the system and found that I have steam all the way to the burner, but not any farther. The oddity is that the same line feeds both propane and steam to the burner so it makes no sense that it shut itself down at precisely that moment. I have opened every fitting along the line and so I know I have steam - so - that leads me to believe the problem must lie in the burner itself. Again, that makes no sense because it worked fine on propane. But as soon as everything cools down, I'll pull the burner and disassemble it on the workbench. I'm composing this entry while letting everything cool down.
January 16, 2019
Just a quick update today. Ray came by with some time to kill, so we pulled the burner off the boat and put it on the workbench. Taking it apart, I found just a tiny bit of debris around the needle valve jet of the burner. Probably not enough to keep steam from making its way through the system, but again, who knows? Everything points to a blockage there so, we cleaned everything in that part of the paint gun and reassembled it. No hurry getting the burner back on the boat because the weather looks like rain for the next week. Still, I'm more than curious to see if that cleaning took care of the problem, so I may pull the boat out of the barn and steam it up if it is not raining too heavily.
January 28, 2019
One of the lessons learned in this whole burner process is that a paint gun - while making a fine burner when it works - is still a paint gun. It was made to pump paint with air pressure. No heat, no fire involved. Adding those elements complicates the picture. Because of the way the gun is plumbed internally, metal to metal tolerances are tight, but not to the point where it prohibits propane from escaping if things aren't going right. And things have not been going right. The needle valve that controls the paint flow at the tip needs to be able to move in order for it to do its job. If it becomes clogged with any kind of debris, it simply fails to work as a paint gun. However, as a burner, if it becomes clogged, it forces the propane backward through the needle valve shaft and results in fire on the wrong side of the boiler. I tried a couple of different things to keep that from happening, but the end result was that anything I added to try to keep it from leaking, broke off and contributed to the problem. In spite of my insisting that I was going to make that paint gun work as a burner, I finally had to throw in the towel and look for something else.
Enter "Paint Gun Number Three". This paint gun was one that I found among my father's things in the garage. I decided that I would leave this gun intact; thinking that cutting number two down to size probably contributed to propane leakage problems. Again, I found that this gun was plumbed differently than the previous two, but leaving it intact seemed to alleviate that issue somewhat. However, I also discovered that this gun used rubber seals in the nozzle area, something that probably wasn't going to work well when the gun was transformed into a burner. Besides, the needle valve didn't fit tightly in its sleeve which seemed to indicate that it would only repeat the problem with Number Two - allowing propane to escape to the outside of the gun. So, even before it was mounted to the boiler, Number Three was re-assembled as a paint gun and put back on the shelf.
Now, to today. I found I had one more paint gun. "Paint Gun Number Four" This one, I knew was plumbed differently than any of its predecessors because it is a gravity feed HVLP gun with the paint container at the top of the gun. Ray and I put our heads together to see if this would do the job and determined that - because it is High Volume, Low Pressure - it actually held promise of working better that any of its predecessors. Oil for the burner is gravity fed on the boat, so that suited the "High Volume" requirement. Burner pressure is limited to 15 lbs. propane/steam so that takes care of the "Low Pressure". Knowing that we were probably going to have some success with this one, we started to modify the system to accommodate this gun. Because of what it is - HVLP - it is only about half the size of a standard paint gun. That means that the existing mounting bracket wasn't going work. So, Ray set out to remove the bracket - a process complicated by the fact that it was original to the boat and was more than 55 years old. One bolt broke off in the removal process and the second one proved most difficult to remove. But in the end, he was able to get it off the boiler housing and we got a good look at what it was going to take to mount Number Four. Ray called it a day at that time and I set out to see what I could design that would get the thing working. I grabbed the bracket we had just removed and temporarily mounted it to the shift mechanism. That's a 2x2 piece of square stock that was located just about the right distance from the fire box to serve as a re-positioned mount for the gun. That - as it turned out - was the easy part. Since Number Four is considerably smaller, all of the connecting plumbing needs to be re-done. Adding a new length of 3/8 tubing solved the fuel delivery problem. The tube now goes directly from the day tank to the burner oil valve. That's something that should have been done years ago, so getting it done is good. However, getting the propane/steam to the gun is proving to be a bit more challenging. That delivery system uses several lengths of tubing, three valves and two tees. Getting it all to fit into the existing footprint is a challenge. That's where I am now, updating this page instead of getting "Old Number Four" mounted.
January 29, 2019
Mounting Number four is proving to me more than a challenge. Picture this: There is a box of pipe and fittings and you are charged with the task of connecting them so that they begin at a flare fitting and end at a burner. In between, you have to have a "T", three elbows, two valves, two flare fittings, a union and a box full of nipples and adaptors to be able to fit it all in a space about half the size of a shoebox. I won't say it was complicated, but it took about eight hours of head scratching before it all came together. Ray came by after work and put in a couple of hours as well. Anyway, I think it's all together. I didn't seal the pipe threads yet - there's a good chance that it's still not a done deal and I didn't want to fight pipe thread sealer if it was just going to have to come apart again.
So, the weatherman says tomorrow will be OK until late afternoon. Depending on Ray's work schedule, we may roll the boat out and fire it up after lunch. I really, really, really hope this paint gun is going to do the job. It's been a frustrating - but enjoyable - task to get the burner changed out, but enough is enough! I'd love to put this part of the project behind me and move on to seriously getting ready to launch it in April.
So, we'll see what tomorrow brings.
January 30, 2019
Ray came over and inspected what I had done with the piping for the propane/steam line and questioned the unsealed pipe threads. Since we were only going to test it, we elected to go ahead. We opened all the valves and put the torch to the burner. WHOOSH! Fire everywhere! And I mean everywhere! I managed to get the propane valve shut off, but by that time we were in damage control. There was a fire in the bilge that was getting bigger so we had no choice but to use the fire extinguisher. That worked, but it sure leaves a mess. Bottom line is - the fire is out and there is no permanent damage. Anyway, lesson learned - there are no shortcuts when you are dealing with propane! Ray had to go back to work, so after the burner cooled I pulled it along with the connecting piping and headed for the workbench - again. I found that not only were some of the threads unsealed, some of the joints were actually loose! Somehow, I had neglected to tighten everything. I took each joint in the line apart - used Teflon tape to seal them and put everything back together one piece at a time. I was just finished with that when Ray was able to return, so we mounted everything back in place - tightly - and fired it up again. Much better this time - no fire surrounding the burner or the piping.
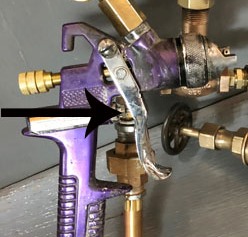
However, there was fire at the trigger of the paint gun. Same problem as we had with the other guns we used as burners. There is a small shaft that controls an internal valve as the trigger is pulled and the fire was coming around that shaft. We played with the settings a little and had no luck stopping that one leak, so we put it away to cool.
Later in the afternoon, I pulled the gun - again - and returned to the workbench. I noticed a threaded piece that supported the shaft as it enters the gun just ahead of the trigger. I started tightening that that nut and got it to the point where the shaft locked up and wouldn't move any more. Then backed it off to where it would just barely move in and out. I was surprised that I was able to turn that threaded piece as much as I was, but then again, as a paint gun, a little air escaping from those parts isn't a particularly big deal - it's just air. In our configuration - using the gun as a burner - any leak is bad. Anyway, I had rolled the boat back into the barn but thought I could get away with lighting the burner just briefly to see if that adjustment had done any good. I did, and it did! There was a beautiful flame at the tip of the burner where it enters the fire box and NO FIRE anywhere else. Tightening that nut seems to have done the job! We'll see tomorrow. It's supposed to rain, but if it's not coming down too hard, I'll pull the boat out of the barn and light it off. I'm more optimistic now than I have been in any part of this process.
January 31, 2019
Aw, Geez - here we go again.
I pulled the boat outside and tried to get the burner operating. I turned on the propane and held the torch up to the tip for quite a while and nothing. Then, all of a sudden - fire all around the outside of the burner. Same song, 20th verse. So, I pulled the burner - AGAIN - and dissected it. It didn't take long to discover that part of the paint gun was made of rubber. That rubber spacer was near the tip of the burner and when I held the torch to the tip trying to get it to light, the rubber piece melted - clogging the whole paint gun. I took the thing apart and cleaned it up to get all of the melted rubber out of the gun. Then I got some of that high temperature gasket material I used to make the head and valve cover gaskets. I sandwiched them to get the same thickness as the rubber spacer and put the whole thing back together. It looks good, but the gasket material covers a lot of holes in that part of the gun. Of course, the rubber did too, but there's a pretty obvious difference it the way the finished product seems to work. I just don't know how it's plumbed inside the casting so I'm just going to have to go back outside to see if it will work this time. I'll try to do that tomorrow, but the weather calls for some pretty heavy rain and I really don't feel like sitting outside in the rain trying to see if the burner will work. Stay tuned.
February 1, 2019
Well, this isn't going like I thought it would, but it is going in the right direction - I think. Backing up a little, those holes in the spray gun nozzle obviously weren't put there for looks. It turns out they did actually do something. Because when I put the gun on the air compressor, I got nothing out of the nozzle with my gasket material spacers in place. So, back to the drawing board. I tried to use the gun holes as a template to drill holes in the spacer. Let's just say that there is now air coming through the nozzle when I put air to it. It ain't pretty, but then a lot of stuff on this boat lacks beauty. It looked like it was going to work, so I mounted everything back on the boiler and took a chance by building a fire with the boat still inside the boat barn. Except that I couldn't get any fire. - HUH? - I had air going through the gun on the bench but when I mount it in the boat, and hook it up to propane, I get nothing. Wait a minute...the only thing that has changed is that I'm running propane through the burner - or trying to. So, I check on the pressure gauge on the tank and it shows what I thought it would...we're out of propane. No, wait! We're not out of propane; I just neglected to open the valve on the propane tank. Well, geez, that might help... So, triple-checking all the all the valves in that part of the system, I opened the main valve and put the torch to it. Viola! Fire! And unlike the past couple of days - fire on the inside of the boiler, where it belongs! I didn't leave the thing lit too long because making steam inside the boat barn probably isn't a very good idea. But I did leave it lit long enough to know that 1) it works and 2) I don't like the flame. I didn't leave it lit long enough to see how much stack temperature I was going to develop (my main indicator as to how efficient the fire is) but I have a feeling by the looks of the fire that it is kind of puny and probably not generating the kind of heat I want. There's nothing to do now but get it outside and give it a thorough test. As I said yesterday, it's raining pretty intensely today and no matter how much fun working on the boat is, working on it in a pouring rain sort of detracts from the enjoyment. So, the first dry day, I'll roll her out of the barn and see what kind of fine-tuning I can do with the burner. At least we're making progress. The burner is working and yesterday at this time I was wondering if I was going to be able to say that with "Old Number Four".
February 2, 2019
Well, this has been an interesting day.
It started with the end of the rain and an almost sunny sky. So I decided to roll the boat outside and see if I could steam her up. As I said in the last installment, I wasn't real happy with the fire I was getting from the burner. That continued to be the case today, so I decided I needed to move the burner nozzle closer to the fire box entrance. That required a lot of adjustment of individual pieces of pipe. It went something like this: Let's see, I need to move the burner two inches closer to the firebox, so I have to add a two inch nipple in one of the upright pieces of pipe. No, now it's too high, so let's back it down by removing the two inch nipple and replacing it with a 1 1/2 inch piece. Now it's too far left, so I need to take that horizontal 1 1/2 inch nipple and replace it with a close nipple. And so on. Every one of those changes means removing the burner and a trip up and down the ladder to work on the system in the shop. Multiply that scenario a couple of dozen times before finally getting the perfect configuration, and you can see where I was getting a bit tired of all the fine tuning. Eventually, however, I was able to get the entire mechanism in place and proceed to fire it up. I had wanted to move the nozzle further into the firebox to contain the oil that seemed to be leaking from the burner. This time the burner was nearly into the fire box, so I fired it up again. The propane has a very nice fire, although a bit too far into the firebox for my taste. And I really have to keep an eye on the oil feed since it still tends to drip outside the firebox and into the bilge. When I lit it off, the propane fire was perfect, if a little too far from the nozzle. But when I added oil to the mix, it just wanted to dribble out the end of the gun into the bilge instead of burning like it was supposed to. So, I basically had a propane fire with oil dripping outside the firebox and eventually into the bilge. I decided I didn't like that configuration and was in the process of shutting it down when I had the mother of all explosions. The neighbors up the street called to see everything was okay - that's how loud it was. I vaguely remember a fireball about six feet in diameter before it hit me. It disappeared in a flash but there was a residual fire in the bilge. I was struggling to get the remaining fire extinguisher unhooked from its bracket and once I was able to do that, the fire was extinguished in a second. The first thing I realized was that I was really hurting. Jan came running out to see if I was alright - as did all the neighbors. The explosion was that loud. After assuring everyone that I was alright, I began to take stock of my surroundings. All the floorboards had been dislodged by the force of the explosion. The plywood that sits loosely over the seats was all blown askew. Everything that had been on the seats was now in the bilge. My face felt like that time I stayed on the beach in Hawai'i too long and got the mother of all sunburns. I double checked to make sure the fire was indeed out and headed for the house. Jan began a damage assessment and immediately began some first aid treatment. My face was burned as were my wrists (I was attempting to shut the fire down when the whole thing went up in flame, so my wrists were the closest thing to the fire,) She had to clean singed hair out of the hair on my head, my beard and my eyebrows. She applied a bunch of burn salve to my face and wrists and we called it good for a while. I went in looked at what was left of my beard and grabbed a razor and proceeded to shave the whole thing off. I went outside and rolled the boat back into the barn and then came inside an poured myself a good, stiff drink.
I'm going to lay low for a while and see how badly I was injured. Then I'll go back to the boat and begin to re-construct the incident to figure out what went wrong. I know I was pouring raw fuel into the bilge, and I'm thinking that may be the cause of the fire. The propane fire ignited the diesel and the rest is history. We'll see if that's what actually happened and if it is, what can I do to salvage the burner to keep that from happening again.
This has taken some of the steam out of my enthusiasm for working on the boat, but I'll get that back - sometime.
February 3, 2019
Ray came by today to see what I looked like after yesterday's adventure. While we were sitting here enjoying a cup of coffee, he had me share what I thought happened. It's only speculation, but I thought the oil leaking from the burner into the bilge caused the explosion. He said he had been thinking about it and felt that the propane, being heavier than air, had somehow leaked and settled into the bilge and caused the blast. Given the severity of the explosion, I have to agree with him. If the leaking oil had caught fire, it would not have exploded like that but would rather have just given a big WHOOSH and burned. So, he came up with an idea that he thought we should try. When I feel like getting back in the boat to figure out what went wrong, we should attempt to fire it again, only this time using compressed air in place of the propane. If the air leaks, no big deal. And yet it should provide the same pressure as the propane does to atomize the oil in the firebox. That's what we will do to try to isolate the leaks in the system - the oil that somehow is not making it to the burner and the propane that is evidently leaking and collecting in the bilge just waiting for a spark to blow everything to kingdom come. So, that's what we will do when I get to the point where I want to pursue the project again. I have to let some burns mellow out first. Stay tuned.
February 9, 2019
Not much has happened with the boat in the past week. I pumped most of the oily water out of the bilge - getting the rest of that out will require some hand cleaning with rags. I cleaned the remaining fire extinguisher residue off the engine and put all the seats and floorboards back in place. Mostly just cosmetic stuff. I have decided that I'm going to try to go back to the original Binks spray gun - if I can find it. I know I put it in a box that I labeled "Spray Gun Parts", but do you think I can find that box today? I've been looking for days with no luck. I must have put it away in a safe place - out of sight and mind. Anyway, I learned with Number Four that I can grind the broken part of the casting off of the handle, then tap it out to a pipe thread and install a nipple. That worked on Number Four - unless an inspection reveals that that's where I was leaking propane. First things first, I have to find Number One. The search continues.
March 29, 2019
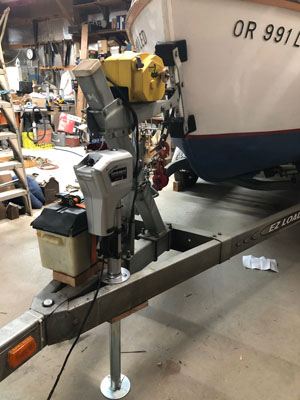
Just a quick update to say that I haven't forgotten to write. I have had the steamboat project on standby while I dealt with other things. I was in a play - that's done now. And I wanted to get the fishing boat done before resuming work on the steamboat. The outboard now has a brand new coat of anti-fouling bottom paint and is once again right side up and back on the trailer. I'm waiting for some new lights to mount on it and then it will be ready to go at a moment's notice.
I think I have decided to use Paint Gun Number Four as a burner, in spite of the incident a couple of months ago. That decision came as much from not believing that the burner had anything to do with the explosion as from the fact that I have been unable to put my hands on Number One. Anyway, as near as I can tell, the explosion was caused by three leaks in the propane/steam line, not the burner. I put that system on air and painted it with soap. Bubbles in three places. So, that's next - getting that system of pipes and tubing absolutely tight before putting it on propane again. I should be ready to resume work on that in a week or so. My goal is still to get the boat in the water by late April or the first part of May.
April 8, 2019
I finally got the other projects crossed off my to-do list and started where I left off on the steamboat. I had identified three possible trouble spots in the propane/steam line, but enough time had elapsed that I forgot where they were. So I hooked that line up to the air compressor once again and coated everything with soapy water. This time, there were only two spots where I was getting bubbles. One was at the union and the other in the entrance to the paint gun or burner. I tackled the union and discovered - to my dismay - that I could unscrew it with my bare hands. It evidently had never been completely tightened. No wonder I almost blew myself up. Propane must have just been pouring out of that connection! I slathered on the pipe dope and screwed the union back together. I know, I know. I shouldn't have to use sealer on the inside of the union. But after going through that big boom, I'm leaving nothing to chance. So, pipe dope everywhere! The other spot was a bit harder to isolate and repair. Since I had broken that paint gun by over-tightening the nipple I had installed in the gun and had ground away the jagged, broken pieces, I had re-tapped the threaded connection and installed a longer nipple. It was leaking air at that threaded connection. I removed the nipple and cleaned everything up as best I could, then really gooped on the pipe dope. Once I re-connected the whole system, I put it on air and soap again and this time I only had one place that was showing bubbles - the nipple at the entrance to the paint gun. I'm pretty sure it was leaking there because I hadn't let the pipe thread compound dry. So - pull the gun out of the system again and remove that nipple. I cleaned it up once again and really piled on the pipe dope - taking care to not let any of that stuff make its way into the internal air chamber. I re-installed it on the boiler and that's where it sits right now. I'm forcing myself to do other things (like updating this journal) and won't pick it up again until tomorrow - giving the thread sealer plenty of time to set up this time. Tomorrow? Back on the air and soap to check for bubbles and if there are none, make sure the set-up is complete and get it ready to fire on propane. That will happen if, and when, it ever stops raining. It is April in Oregon, after all.
April 9, 2019
It was a day filled with interruptions, so I didn't get nearly as much done on the boat as I thought I would. However, I was able to put the propane/steam line on air and painted it with a soap-y solution. I still had bubbles, so I backed everything off a couple of threads and started tightening once again. Everything just felt better this time and I was sure I was going to be successful. Sure enough, I fired up the compressor and slathered on the soap. No bubbles! So, what does that mean? Well, when I tried to blow up the boat a couple of months ago, it was because of a leak in the propane system. So, I feel that I can now safely charge that system with propane to fire the boiler. However, there's still some testing to be done. The burner also requires oil and when things blew up, that part of the burner wasn't working properly. So, I will next see how I can get the oil to flow properly into and through the burner. Then, if I'm successful, I'll try once again to fire the boiler on a propane/oil mix.
April 28, 2019
I have been working on other projects - yes, there is a life beyond steam - and have not done much on the boat. I bought a battery for the steamboat trailer so I don't have to keep playing "trade-a-battery" with one of the other trailers. Let's see, what else? I spent several days trying to "marry" a hand crank tongue jack to an old electric one I have had laying around for 30 years. The motor was fine - it just wouldn't elevate. That took almost a week of my time and I still couldn't make it work to my satisfaction so I just went to Amazon and bought a new one - electric. Took me two minutes to order it and I had it in two days. Damn! It's nice! I should have done that two weeks ago, before I wasted a week trying to create "Robo-jack". So, the new jack is all wired in and the battery is hooked into the charging system on the Expedition - so I have no reason to procrastinate anymore. I did pull the burner apart and put it back together again - sealing all the joints as I did. When I put that assembly on air, I discovered one more leak - one that would have seen a repeat of my earlier adventure with the propane, so I'm glad I found it. There is a valve at the low point in the steam/propane line that - when opened - discharges any collected moisture in the line straight into the bilge. In the process of re-doing the burner system, I had replaced that valve. It turns out that second valve was not seating well. In fact, it could be said that it was not seating at all. It would not have been a pretty sight on propane! I replaced that valve with yet another one off my parts shelf and this one is good. Once again, I tested the burner system on air - this time the ENTIRE system. No bubbles. Everything is tight. The weather has been good, the clock is running on my projected launch date - but - I have not been able to get myself to light that system on propane. The memory of that big fireball is still to vivid I guess. I'll get there.
May 1, 2019
I finally got brave a couple of days ago and fired the boiler using propane and oil. I didn't have a wonderful flame, but it was working and the stack temperature started to climb. Then, all of a sudden, the propane shut off and all I had were drops of flaming oil dripping into the bilge. Sounds like what I was experiencing before the big boom. I just shut everything down and waited for it to cool.
As usual, I got involved with other projects and didn't get back to the burner for a couple of days. Ray came by while I was working on some other things, so I put them aside and concentrated on the burner. We began diagnosing the problem and finally came to the conclusion that the reason I'm not getting any propane has to be inside the paint gun/burner. So we pulled it off the boiler (again) and put it on the workbench. With an air gun, we found one spot inside the paint gun that was a prime suspect for the location of the blockage. We pulled everything apart and sure enough, there was another plastic piece inside that gun. Again, not a problem if you are using air and paint, but once you introduce heat, plastic sucks. We spent quite a bit of time trying to substitute metal for plastic when Ray asked, "Do we really even need the valve" that we were trying to replicate. Well, we talked it over and decided that a paint gun WOULD need that secondary valve to operate correctly, but we are not painting. All I need is something to act as a nozzle to combine propane/steam with oil. Period. Heck no, we didn't need that valve. So we plugged it up with JB Weld - taking care not to plug any air passages - and waited for the JBW to cure.
May 2, 2019
OK, here goes. I'm putting the thing back together and mounting it on the boiler. Then I'll see if I get any propane through the gun.
Well, here we go again. Good news and bad news. Good news first. The burner worked just like it is supposed to. A nice strong blue flame. Stack temperature was climbing steadily - although slower than it used to climb - when (bad news) the propane pressure began to fade. I saw that the tank was frosting over, so I switched tanks and resumed the process. This time, I once again saw that the stack temp was leveling off way too low and the fire was having problems. Since it was getting close to switch-over time (from propane to steam), I figured that was what was happening. See January 15, 2019 for a reminder of how that system works. One thing led to another and we traded ideas on what the problem was. I was convinced that the check valve in the system had gone "gunny sack" and needed some attention. So, as I began to open the flair fitting that connects the check valve, we got a lot of water out the fitting - a lot of HOT water. There's no way we can have hot water there unless something has gone amiss. So - okay - check valve failure. No way should we have had steam - or even hot water on that side of the valve. I rummaged through my valve box and came up with one of the few remaining check valves I own. We tested it on air and it worked just like it is supposed to. So, we swapped out the bad valve for the good one and called it a day. I re-filled the boiler and I'll be ready for tomorrow.
May 3, 2019
I hate to be redundant, but another "good news, bad news" day. It was afternoon before I was ready to go, so I called Ray and told him I was ready to try again. When he arrived, I fired it up and once again, we had a nice pretty blue flame. But, not much heat. The more I think about it - as pretty as it is, that fire should not be that blue. The oil tends to make it more yellow. Hold that thought for a few minutes. We watched the stack temperature climb to around 300 degrees once again and once again, it leveled off there. By now, both of us are convinced that there is some sort of blockage that is preventing the gun from doing its mixing job properly. So, I took the paint gun off the boiler (again) and we put it on the workbench. Back toward the beginning of this narrative, I described a rubber spacer that had to be removed and something heat-resistant inserted in its place. I used gasket material, but it was far too fibrous to make the kind of clean-cut holes we needed in the piece. So, while we had the gun torn apart, I peeled what was left of that spacer off the mating pieces and tried to repair it. Bottom line? It is too far gone to make it work well. Ray thought he might have something equally as heat resistant but less fibrous in his shop so we went in search of that. We had no luck finding the stuff he was thinking of, but in the progress of the search, he unearthed a couple of pieces of enameled sheet metal. That got me to thinking - is there any reason that spacer has to be made out of soft material? Wouldn't a few layers of sheet metal at the proper thickness work better? For one thing, the mating holes required in the spacer would be far cleaner when drilled through metal than through fiber. We took our new-found bounty back to my shop and started measuring thicknesses. The spacer needs to about 1/8" thick and that's about three of the metal pieces. We looked at the rest of the paint gun to make sure everything would fit and it was then that Ray noticed a threaded piece at the end of the needle valve area - with no corresponding piece to fit into it. Sure enough, there is obviously a piece of this paint gun missing. And it has been gone for a long time because in all of the times I have dis-assembled and re-assembled that thing, I have no memory of such a piece ever being there. I searched through my "spray gun parts" jar with no luck. But we both are certain there is a piece missing in that gun. That would explain the dripping oil and the lack of enough temperature get a proper head of steam. Low stack temperature is indicative of a bad fire and I have mentioned a couple of times how I was not happy with the fire I was getting when I lit things off. So, Ray is going to be going into town the middle of next week and will pick up a new paint gun at Harbor Freight. The plan is to continue to use this gun and to cannibalize the new one for the parts we need. This is Friday and he won't be back in town with the new gun for a week, So, until then, I'm back on the shelf again as far as steaming goes.
May 6, 2019
What a weekend! Where to begin? I guess the best place would be where I left off. I found the missing piece of the paint gun. That's something that almost never happens, so don't ask. Bottom line is - I found it, so we were back on track and Ray doesn't have to pick up a new paint gun when he goes to town this week.
I won't go into all the details about the frustrations of the three days since, other than to say that we have had the gun off the boiler more times than we can count and we still have propane leaking from around the business end of the paint gun. I've tried everything I have on the shelves - the latest being a Teflon-infused high temperature thread sealer. While it was on the bench, I put the burner on air and soap - got no bubbles - so I thought I was finally in business. Re-installed it on the boiler, lit it and - whoosh, more fire from around the tip of the burner. I was so frustrated after that that I said to myself, "Maybe I should just weld the threaded piece onto the gun." Weld. Hmmmm. JB Weld. Is it possible that stuff might actually seal it up enough to quit leaking? It is actually pretty good for getting two pieces of - whatever - stuck together, so what do I have to lose? Other than the minor detail of ruining the nozzle on the paint gun, I mean. So, that's where I am right now, waiting for the 4-6 hour setup time for the JBW to cure. Stay tuned.
Same day, 8:30 PM
Well, this has been a most interesting eight hours or so. I'll pick up where I left off once again.
Ray came by to check on today's progress and when I told him where we were, he agreed that two hours was enough for the JBW. I put the burner on air and soaped it up once more and again, there were no bubbles escaping from any part of the burner. So, we fired it on propane and guess what? Yep, you're right if you said we had fire where it wasn't supposed to be again. The JBW was working everywhere except those tiny threads on the tip of the paint gun. We couldn't for the life of us figure out why that was when everything tested okay on air. So, we decided to actually pour some oil into the equation by filling the HVLP cup that held the paint a long time ago. Sure enough, when we opened the valve for air, all we saw was a tiny bit of oil being sprayed through the nozzle - and I'm talking a microscopic amount of oil. What we did see a lot more of were bubbles coming out of the oil container. I believe I mentioned before that I was concerned when I discovered that when I opened the air/propane/steam line it back-fed through the oil input. Well, that's what is happening and it's robbing all of the air that should be going through the nozzle. Apparently, the gun is plumbed that way and there's not a damn thing we can do about it. It was a reluctant decision, but we felt we had no choice but the put "Old Number Four" on the shelf. Five months of on and off work on that burner system and I'm right back where I was in December.
About that time, Ray had to go to work - he's working a job in a neighboring state and will be gone again for several days. So, I'm back on my own.
I'm kind of limited in my options. I mean, there is no "Steamboats 'R Us" here on the coast, so coming up with another working burner meant doing with what I had. So, what DID I have?
Number One had gone to the Witness Protection Program. (I can't find it after all these months, so that's the only explanation I have). Number Two leaked fire in the most inopportune places. Number Three was made of rubber and Number Four - despite its promise of being the answer - proved to be anything but. After looking through those options I decided the only choice I had was to re-visit Number Two.
I went back through my notes and realized that the only real reason I put No. Two on the shelf was that I couldn't make it fireproof. I've learned a lot since making that decision and decided to give it another try. I eventually combined parts from all four paint guns in the finished product - the new Number Four.
I carefully re-assembled it and added some springs to the needle valve so it can open and close with ease. I think I have that issue solved and can move on to the next before we all lose interest.
So, that's where I am, scavenging parts from other paint guns to make one that works under our rather odd circumstances. I'll test this one under air tomorrow.
May 7, 2019
My steamboat tinkering time was limited today. I had to take a friend to Tillamook to take his driver's test (he accidentally let his license expire) and then the boss decided we would go to Warrenton to do some shopping. By the time we did Costco, Verizon and Home Depot, (plus the two hour round trip driving time), the afternoon was pretty much shot. I did manage to finish the assembly on Number Two but then decided I would hard-pipe the system rather than connect and support it with copper tubing. That's going to take a while (see February 2 entry for the reason). So, I'll wrap this up tonight before I fall asleep at the computer. The plan is to run air through the piping once if finish with it. If it passes the bubble test, I'll go for the propane.
May 8, 2019
Well, after spending a full day back and forth between the boat and the shop, I have come to the conclusion that none of these paint guns are going to work. I don't know how the guy who built this boat got that Binks spray gun to work as a burner, but I have had no luck trying to duplicate that method with other spray guns. Initial tests on Number Two showed promise, but when I put it on air, I had the same problem I did the first time I tried to use that gun, oh so long ago. Now I'm getting a little concerned. The boat was supposed to be in the water by now and I don't even have it running yet. I have been trying to use a paint gun because that's what was originally on the boat and it was working just fine. Oh, how I wish I could find "Number One" again. But I can't, so I tried to figure another way to get the job done.
As I said earlier, all I need is a nozzle that will combine oil and steam. So, I'm trying to make my own. I took a piece of 3/8 copper tube and crimped the end with a tiny drill bit in the middle. The result is a nice little copper container with a small hole in one end. Then I took a piece of 1/8 copper tube and found a drill bit the same size and drilled an angled hold through the side of the larger tube. I brought the smaller tube to within 1/8 inch of the hole. I threaded flare fittings onto both tubes and then sealed everything with JB Weld. I have absolutely no idea if this contraption will work, but desperate times call for desperate measures. I'll try it out tomorrow. Wish me luck.
May 11, 2019
Well, that didn't work.
So, now what? I'm looking online at commercial oil burner nozzles, but those guys speak a different language. Things like psig and scfm and spray angle. I guess I'll have to wait until Monday and call a sales representative. Hopefully, I can find one that is interested in making a steamboat work.
May 16, 2019
Not a lot to report. After a search that lasted most of a day, I finally found a burner and adapter that might work. The problem is that there is a rubber "O" ring between the two parts. Still, since it's made for a furnace, I'm thinking it might work. I found a supplier in Astoria - about an hour from here. Unfortunately, I haven't heard from the representative since our first phone conversation a couple of days ago. I know that my situation requires a bit of homework on their part since I don't just have a model number or existing burner, but hey guys - I really need to get going with this project! It is frustrating to just sit and wait, but short of going to Astoria and talking to someone in person - which I'm about to do - that's all I can do.
May 17, 2019
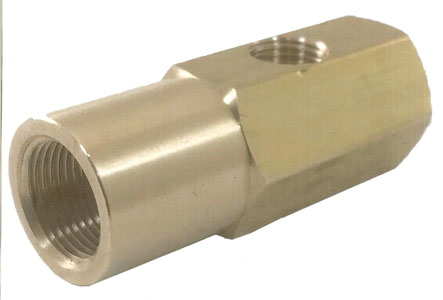
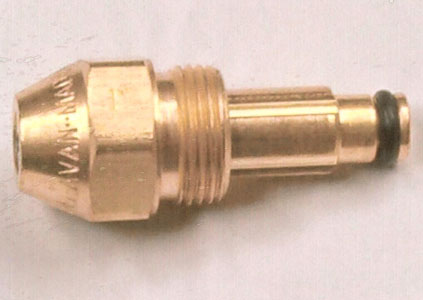
Well, that's what I did - or at least attempted to do. I went to Astoria, but the guy I had talked to on the phone was out on a job. The woman at the desk assured me that they were looking for what I needed and as soon as the rep was back in the office, she'd have him call me. Sure enough, he did. In the course of our conversation he seemed to show a lot of interest in the boat and especially this project. I gave him the web address and he was looking at the site while we were talking. Anyway, the news he had when he called wasn't the best. It seems the nozzle (photo at left above) I was looking at is no problem; they can get one of those anytime. However the adapter (right) that takes the - in my case - steam and oil doesn't exist. There's a part number and a picture, but evidently they don't make it except in extreme circumstances. I consider this to be one of those extreme circumstances, but doubt if I could convince the manufacturer of that. Anyway, the rep said that now that he had a better idea of what I need, he would continue to look for something that would work for me. He knows I'm on a tight schedule. I did consider making my own adapter based on the picture I have, but I'm sure there's probably more to it that meets the eye from a single photograph. So - I'll wait. For a while.
Funny thing - it turns out that the burner nozzle place is right across the street from Englund Marine. Well, I couldn't just drive by without stopping in and seeing what I could find. I came home with a marine radio (which I need for the fishing boat more than the steamboat) and also an electric fuel transfer pump. Getting fuel into the steamer is almost impossible without making all kinds of a mess and this should help a lot - just push a button and fuel goes from the gas can to the filler with no mess or fuss. Can't wait to try both of my new toys.
May 28, 2019
Not a lot has happened in the past couple of weeks. The guy in Astoria connected me with an oil heating company in Portland. The representative at that company quizzed me about the application and pretty much told me that I could not atomize with steam. My reply was that we've been atomizing with steam for years and would he just sell me a nozzle and adaptor - please? So, I picked up a nozzle and adaptor there last week and they have been sitting on my workbench ever since. I've just been too busy with other projects to devote any time to this one, even though it is arguably the most time-sensitive right now.
So, here's where I stand. The new burner appears to be just what I need except that I'm going to have to adapt it just a little. It came with two compression fittings and I want to change those to flare fittings. I have removed the compression fittings, but with the holiday weekend, I was unable to get the parts I need to complete the job. Now, with the holiday behind me, our houseguests gone and the house projects almost complete, I'll get back to getting the burner on the boiler. I need some adaptors so I can mount flare fittings on it and once that's complete, I can fire it up and see if it works. If it does, I'll probably be singing "I should have done this months ago" and if it doesn't - well, I'm back to square one with no "Plan B". I'll cross that bridge later if it comes to that.
Saturday, June 1, 2019
Well, I'm singing, but it isn't "I should have done this months ago". It's "I should have done this YEARS ago!!".
Let's back up just a little. I have had so many projects going that - as I said - I haven't been able to even think about the boat. Well, the painters are gone and most of the stuff is back on the walls. The fishing boat now has an electric crab hoist because I saw my daughter and son-in-law's in action on their boat and decided I needed to make one for our crab hoist. It's not as pretty as theirs but it works. I cranked that out in a day using parts that I had lying around. That's why I never throw anything away! While they were here, we had to go fishing and crabbing for two days over the holiday weekend. Anyway, I have been doing everything EXCEPT working on the steamboat. That bit of procrastination was brought to a screaming halt when Ray called and asked how the steamer project was going. Well, it was embarrassing to tell him that I hadn't done anything on this high priority job and that got me back in the mood to tackle the burner installation and testing. And once I made up my mind to get going, I plowed right ahead.
Long story short; I finished it in a day and a half, and once Ray got here, we tried it out on air and soaped every joint multiple times. We discovered one small leak and once that was repaired it was time to hook up the propane and fire it up.
I have to admit that both of us were just a little nervous about that, but it fired right up with no problems. The propane was atomizing the oil just like it was supposed to and the burner was working just great. The only issue came when we started seeing a little wisp of smoke coming off the brightwork. Since we couldn't identify the reason for that, we agreed to shut it down and investigate once everything cooled down.
Ray had to leave and I got involved with something else while I was waiting for the pipes to cool. It was a couple of hours before I took the burner off the boiler and opened it up. We were afraid that rubber "O" ring would fail with the burner getting so hot, but it held up well with no sign of any deterioration. I put it all back together - mounted it on the boiler again and fired it up.
At this point I'll admit that I was just a little disappointed in the fire. Oh, it was heating water just fine and gave me about 400 degrees of stack temperature. But it looked like all of the flame was just barely inside the burner box, not out in the center where I was used to seeing it. And it was a little "ball" of fire, not the "cone" shape the burner literature advertised. All I needed though, was for it to get to 20 pounds of pressure so that the propane would shut off and steam would take on the atomizing responsibility.
It took about 15 minutes for that to happen and when it did, it was a seamless transition. If I didn't know what to listen for, I probably would have missed it. The old burner didn't like the transition and would almost blow itself out with the infusion of steam. Not this burner, it handled the new atomizing source with scarcely a whimper. And the fire! The fire was just like the photos in the literature - a perfect cone shape. It didn't take long for the boiler pressure to start climbing - I was at 120 pounds about 45 minutes after I lit the fire. It used to take about an hour, but then I didn't have much water in the boiler which shaved a few minutes off the time.
There was a whole lot of whistle blowing and a huge grin on my face. I've been working on this burner issue for six months, so I'm pretty happy. As I said, I should have gone to a commercial burner years ago. It would have eliminated a lot of problems we have had controlling the fire.
Next, I'll start working at getting the engine running with the boat on the trailer. If that works, it will be time to launch - which is what this section of the website was supposed to be - the 2018-19 steaming season.
June 18, 2019
I steamed up a couple of weeks ago, but ran out of time to do much other than identify the areas where I had steam leaks and determine that the engine was not going to turn over. So, now that we're just a couple of weeks from July 4th, I really, really have to dedicate myself to finishing this part of the project. Since I had a full head of steam a couple of weeks ago, I wasn't concerned about having it "parade-ready", but when I tried to steam it up today, it wouldn't work. It fired up on propane and oil just fine, but it failed to switch to steam atomization at 15 pounds. I went up to 22 pounds and shut off the propane and the fire just went out. It hadn't switched over to steam. I hammered on the check valve that is the primary component in that transition - but it wouldn't switch over. I traced the steam atomization line back to the boiler and discovered I had failed to open that valve. So, no steam. I opened it and tried to re-light the burner, but it didn't want to work properly. I couldn't get the oil to light. I was really getting discouraged by this time and I walked away to allow everything time to cool - including me.
Once things had cooled, I pulled the burner and checked the oil line. Everything checked out just fine - the line had oil in it and the burner was clear with no blockage. So, that's where I stand right now. I'll re-install the burner and try it again; this time with the steam supply valve open. I'm hoping that because I didn't open that line until I had pressure on the system that somehow it fouled things up sequentially and didn't allow them to operate in their normal progression. I'll do that tomorrow.
June 19, 2019
It didn't take very long this afternoon before I discovered that doing things in the proper sequence didn't help. I have oil flow when I break the connection to the burner, I can blow down the oil line in the burner, but I can't get oil to flow through the burner. It worked great when I first used it and it hasn't worked since and I haven't changed anything. Damned frustrating.
June 22, 2019
I took the burner off the boiler and tested it out. No blockage, everything seems to be in order on air while on the workbench. So I re-installed it and fired it up. I get a mediocre fire, enough to get to the point where steam should replace the propane as the atomizer. But when I get to that point, the fire just goes out. That - to me - means that there just isn't enough oil flowing for the steam to atomize and so there is nothing to burn. The propane is flammable so it will burn while acting as an atomizer. When the switch-over occurs, the steam of course is not flammable and it relies on the atomized oil to keep the fire lit. I know this burner is supposed to work on vacuum - somehow - but I really don't understand how. What it apparently is supposed to do is create a vacuum on the air side of the burner which serves to help suck the oil into burner on that side. I think it's working like that, but I'm just not getting enough oil flow for the vacuum to suck anything. Picture a milk shake and a straw. When you have finished your shake, all the sucking (vacuum) in the world isn't going to get anymore shake through the straw. It's gone. That's what I think is happening in this system. The propane appears to be working alright and I can only assume that it is trying to do its job by sucking the oil into the chamber behind the burner. But for some reason, there just isn't enough oil to make it work. I texted Ray with my dilemma and now he's doing some research to try to find an answer. The only thing I can think of is that we have the adapter plumbed backward. We had no instructions with the burner, so Ray went to the Internet to find a solution. Most of the burners (but not all) are plumbed the way we did it. I'm ready to switch the two inputs on the burner adapter and see what happens. I'll wait until Ray has done some more research, however.
June 23, 2019
Both of us have been looking online for more info. We have determined that there is no reason to switch the inputs - the thing is plumbed correctly. The more I think about it, the more I'm convinced that this burner just isn't allowing enough oil into the system to let it operate correctly. If there is a vacuum, it's not sucking enough oil to make a difference in the flame and if I shut the propane fire off, everything shuts down. There is no residual oil fire. What is really perplexing is that it worked beautifully the first time out. So I know it should be correct. Still, I looked online for a bigger burner only to find that this is the largest one made by this manufacturer. I'll try to call the sales rep tomorrow to see what he has to say. I say "try", because I seem to have misplaced his name and contact information. It's around somewhere, I'll find it.
June 26, 2019
It's hard for me to even write this, but after six months of work, it appears I'm back to square one. I talked to Bill, the sales rep that I was looking for, and the conversation went something like "The burner you sold me isn't working. I'm not getting any oil through it". "How much pressure are you pumping into it?" "I'm not using any pressure. It's a gravity feed, remember?" "Gravity feed? It won't work as a gravity feed. You need a pump". "I don't have any power on board, that's why it's a gravity feed system." "Well then, it appears you're SOL." He didn't say that last line in those terms, but that was the message. So, after four paint sprayers and one commercial burner that worked once and won't any more, I'm right back to where I was in December when I started. Disappointing doesn't even begin to describe this state of affairs.
I called a fellow steamboater to pick his brain and he told me that he's using a Beckett 12-volt burner on his boat. I looked it up and it is huge. His boat and engine are larger than ours and he can use something that size, but it wouldn't work for me. Besides, when I reminded him that I had no power source onboard, his response was remarkably similar to the final thought from the sales rep. He did agree that the old Binks Model 5 spray gun was probably my best option, even though I can't find the one I took off the boat in December. He thought that if I made the rounds of auto body shops, that I'd find one stuck away on a shelf somewhere. I don't have a lot of options - there aren't a lot of those in our neighborhood, but I'm going into Tillamook today and I'll see if I can find something that someone wants to part with. I have just one week until the Fourth of July and the parade, so I'm desperately behind schedule. Even if I can find one, modifying it for my needs will take a huge chunk of that remaining time. I'm not giving up, but it's beginning to look like we may not make it into the parade this year.
June 28, 2019
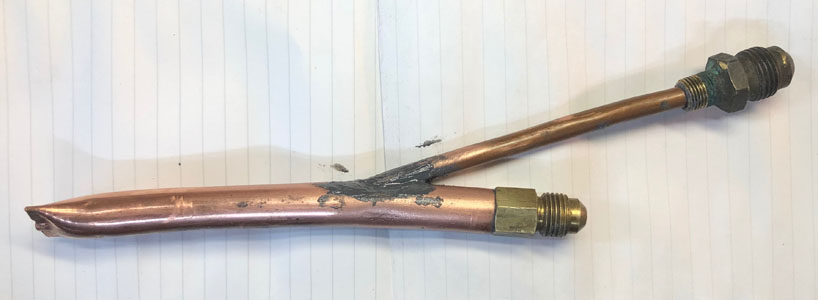
I went to the body shop in Tillamook and told them I was looking for an old Binks spray gun. The woman I spoke with said that the guy I needed to talk with was out and that she would relay the message, but she didn't sound like I had a snowball's chance at finding something there. She also didn't sound like she was all that interested in even relaying the message, so I'm chalking that up as a lost cause.
I did however stumble across a video on You Tube showing a homemade atomizing nozzle. It wasn't a burner, but it was apparent - at least to me - that it could be made into one easily. Ironically, it's almost an exact duplicate of one I started back in the first part of May. Mine, however, didn't have the correct spacing between the propane/steam line and the oil delivery tube and as a result, it didn't work. Had I seen this video back then, I would have known to change the spacing and - at least according to the video - it would have worked. So I gathered the parts I needed to duplicate the one in the video and set out to make my own burner. I finished it tonight and the plan is to try it out on the boat tomorrow. Wish me luck - this is likely my last chance at coming up with something before the 4th.
June 29, 2019

What a day! Where to begin? I got a delayed start on the boat today, in spite of my best intentions. I had to address a problem with the fishing boat because there was standing water up over the deck plate. I finally narrowed it down to a faulty float switch on the bilge pump. I had a couple other things to do that involved helping some other folks so my day wasn't really mine until after noon. Just as I was headed for the steamer with the new burner, a strange car pulled up in the driveway.
It turned out to be one of our favorite Cubans, Rigoberto and his girlfriend Anna. Rigo is a natural mechanic and after making small talk in the house, he and I went to the steamer. We tried my burner and while it did work, the results were less than satisfying. From that point on, I was pretty much a spectator as Rigo started re-designing the system. We worked on it all afternoon and by the time we were done, it bore little resemblance to what I started with. Bottom line? It works! We were able raise steam almost to the pop-off level before shutting it down. It isn't a terribly pretty fire, but it sure does put out the heat. We had whistle pressure in a little over a half hour - albeit with relatively little water in the boiler. So it looks like we're back on schedule for the parade - or parades, as we have been invited to a neighborhood celebration where people bring whatever they have from cars to tractors to bicycles to - well, steamboats. That will be after the Manzanita parade. We couldn't get the engine to turn over, so that still is on my "to-do" list, but thanks to Rigo, we have an eleventh hour reprieve and we'll celebrate the fourth in the parade rather than watching it from the sidelines - something that was a real possibility 24 hours ago.
July 8, 2019
Not a lot happened with the boat between the time Rigo left until July 3rd, when we started getting the boat cleaned up in preparation for the parade. Most of the delay had to do with fishing and such, so it wasn't as though I was just sitting around. I did attempt to fire the steamer up on the 3rd and - well - that beautiful fire we had at the end of June wasn't there. It had been replaced with my old friend - fire on the wrong side of the boiler. I couldn't believe it - when we put the thing away it was working great and then when I tried to fire it up, it leaked! And as I've said repeatedly, a leak in the propane side of the burner is not good. I had a couple of minor explosions - nothing on the scale of the big one a few months ago - and shut everything down. This was late in the evening on the day before the parade and by dark, it looked like we were not going to be able to have steam for the whistle.
I got up early on the morning of the parade and tore the whole burner apart and replaced a "T" that was the source of the leak. The new "T" was larger than the first one and so, required replacement of everything forward of it - including the business end of the burner. At 8:30 on the morning of the 4th, I fired it up again and it worked! I was able get a full head of steam. That was cutting it a little too close for me!
So, we made it to the parade, tooted the whistle for an appreciative audience and took the boat to the site of the second parade. We left it there while we went home and had our own picnic and by the time we returned to the parade site, we had lost most of our steam. I was nervous about re-firing it with propane but it worked well and we had we had a full head of steam in time for the start of the parade.
So, after six months of fiddling around trying to come up with a burner that would work, I finally had one. There is still a little fine tuning to be done on this burner, but the bottom line is that it works. Next, I have to get the engine to turn over and get this thing in the water. The next event - our annual steam meet - is five weeks away.
July 24, 2019
The weather has been miserable for this time of year, and even when it has cooperated, there have been other projects commanding my attention. I know, what could be more important than the steamboat, right? But, a contractor here to install a new deck on the house and another to do some smaller projects on the old church have really eaten into my timeline for getting this thing ready for the water. Oh yeah, then there was that issue with my thumb and the table saw. Minor stuff.
One thing I did try was to decrease the size of the oil tube. The 1/4-inch tube was allowing too much oil into the burner and was very hard to control with the valve I have in the line. I could only open it a fraction and increasing or decreasing the flow required microscopic movement of the valve handle. Ray picked up some smaller tubing at a hobby shop and I tried that in the system, but it was apparently too small and I was getting no oil flow at all. So, back to the one that worked.
I really, really need to get back on track and get the engine running on this thing. We're only three weeks away from the steam meet in Sequim, Washington. Plenty of time, right? Between now and then, there's my wife's cousin's reunion with a houseful of company along with Ray working at installing a ramp between the church and the boat barn. There's a mini-crisis at City Hall that has been whittling away at what little time I have remaining. Oh yeah, and then the issue of trying to work with a sore thumb. Just excuses - time to get'r done.
Onward and upward!
August 8, 2019
In spite of my determination to concentrate on the steamer and only the steamer, that just hasn't been possible. As I said, there are just too many other things in the way. Nonetheless, I have put some time into getting her fired up, it just hasn't been enough. The burner really needed to be re-routed. The way Rigo had done it worked okay, but one of the tubes in the steam side was right next to the valve that controlled it and I kept burning myself on it. So I tore it down and re-did it. Something I didn't really need to spend time on right now, but it is much cleaner and that irritating burn issue has been resolved.
Okay, so where does that leave me now? I still have not had the engine turning over. I attempted to do a hydro test on the boiler, but I evidently didn't have enough water in the boiler and I gave up on the hand pump after an hour or so. I was able to maintain what pressure I was able to generate with the hand pump, so I'm confident that it would pass the test. The problem is that I was only able to get it up to 120 pounds with the hand pump and it needs to be twice that for the test.
We leave for the steam meet in Sequim, Washington tomorrow morning, so I have one last chance to get the engine rolling over. Today. That's it. After nine months of working on it, it all boils down to one last day. And not just any day. I mentioned that Ray was installing a ramp to the church? Well, today's the biggest day in that project. The beams that form the bridge are going up. Luis is bringing one of his workers - not Rigo - and between the four of us, we need to get those 16-foot 4x12s up in the air and in place. There's not a lot I can do to help, but I absolutely need to be there. So, I will try one last time to steam up and get the engine to roll over this morning as soon as I can do so without waking the neighbors. After that, it will be time to get the boat ready to trailer to Sequim tomorrow morning. It is going to be a busy day.
August 24, 2019
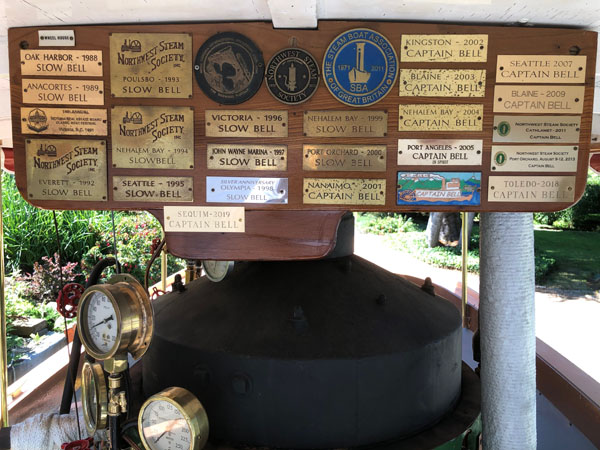
I worked on the boat until 9:00 PM the night of the 8th but couldn't quite get to the point where I could attempt to get the engine turning over. So - I took the boat to Sequim knowing that for the second year in a row, I was just going to be a shoreside attraction. We took our daughter Leslie and her husband Jason with us as our guests. As it turned out, my son-in-law drove the entire way there (and back) so it was a relaxing trip for me. The place they had us park the boat and trailer was right at the head of the ramp to the docks where the other steamers were moored, so we attracted a lot of attention from those headed for the boats in the water. I'm sorry I couldn't join them this year, but I'm glad I decided to take it anyway. Each annual meet of the steam society that we attend earns us a commemorative plaque and the board where those are mounted was completely filled, so I had to modify it. That's about the only change I have made in the boat since we returned from Sequim.
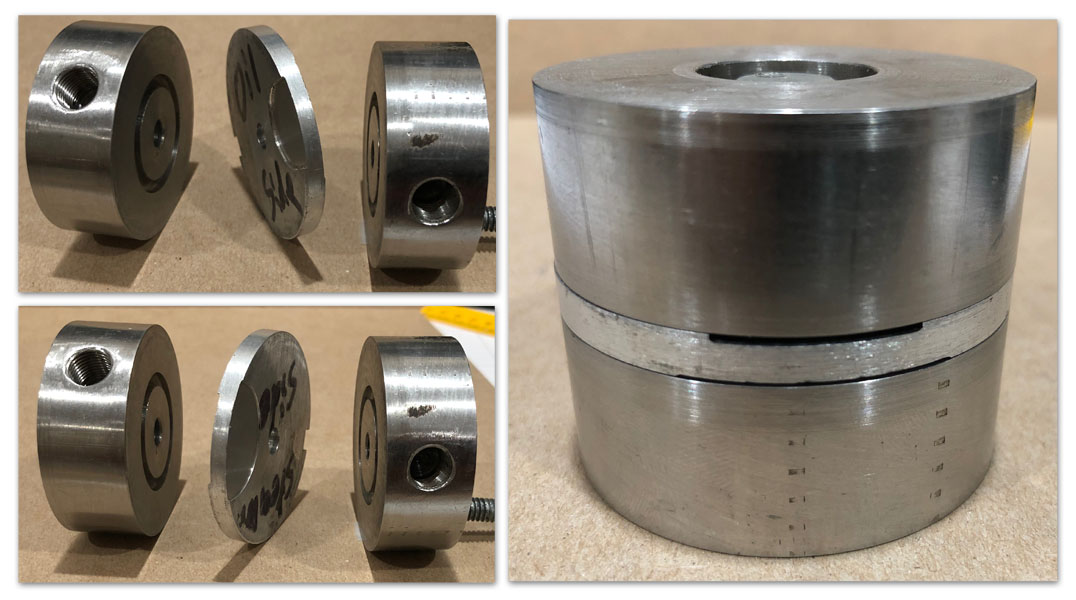
As usual at one of these meets, I get the opportunity to talk with other steamers and a lot of information gets shared. In the course of explaining why the boat was on the trailer and not in the water, I related my burner woes. In spite of me explaining that I thought I had that issue settled, one of the guys offered to send me a burner he had sitting on his shelf - just to see if it would work better than the one I made. It arrived in the mail yesterday and I'm not too sure if it will work in my application but I will give it a try. It's a bit different than what I'm used to. For one thing, it looks like a fat hockey puck with the business end on the edge of the puck. It's a drip style burner - where the oil orifice is above the steam inlet. As the oil drips, it is captured by the steam below and is atomized. I've seen those before but rejected that style when attempting to come up with a burner. But - as I said - now that it's here, I'll give it a try. I am going to have to figure out how to adapt my burn box to accept the hockey puck, but anything is possible.It is incomplete the way it is right now; it is going to take some thin gasket material between the layers of the unit, so it will have to wait until I can get to a shop where I can buy some.
But, I have a burner that works pretty well right now, so after taking a couple of weeks off the boat project, it's time to get back to the original plan - getting the engine running and getting the boat in the water.
September 20, 2019
Well, obviously two weeks extended into quite a bit more than that. Between other projects and the fact that autumn sneaked up on me in a hurry, all I have done with the boat is pump rainwater out of it. I guess it's time to admit that it's not going in the water in 2019, and roll it back in the barn for the winter. And once I do that, I'm going to start a new page titled, "The 2020 - 2021 Steaming Season". I learned a lot this season - most of it having to do with dealing with the way things will NOT work. But even that is educational. Wasn't it Thomas Edison who denied failure on a project - saying instead, he had learned ten-thousand ways it would not work? I may not be at 10K, but I can definitely relate.